Showing posts with label Bunad. Show all posts

Saturday, 12 May 2012

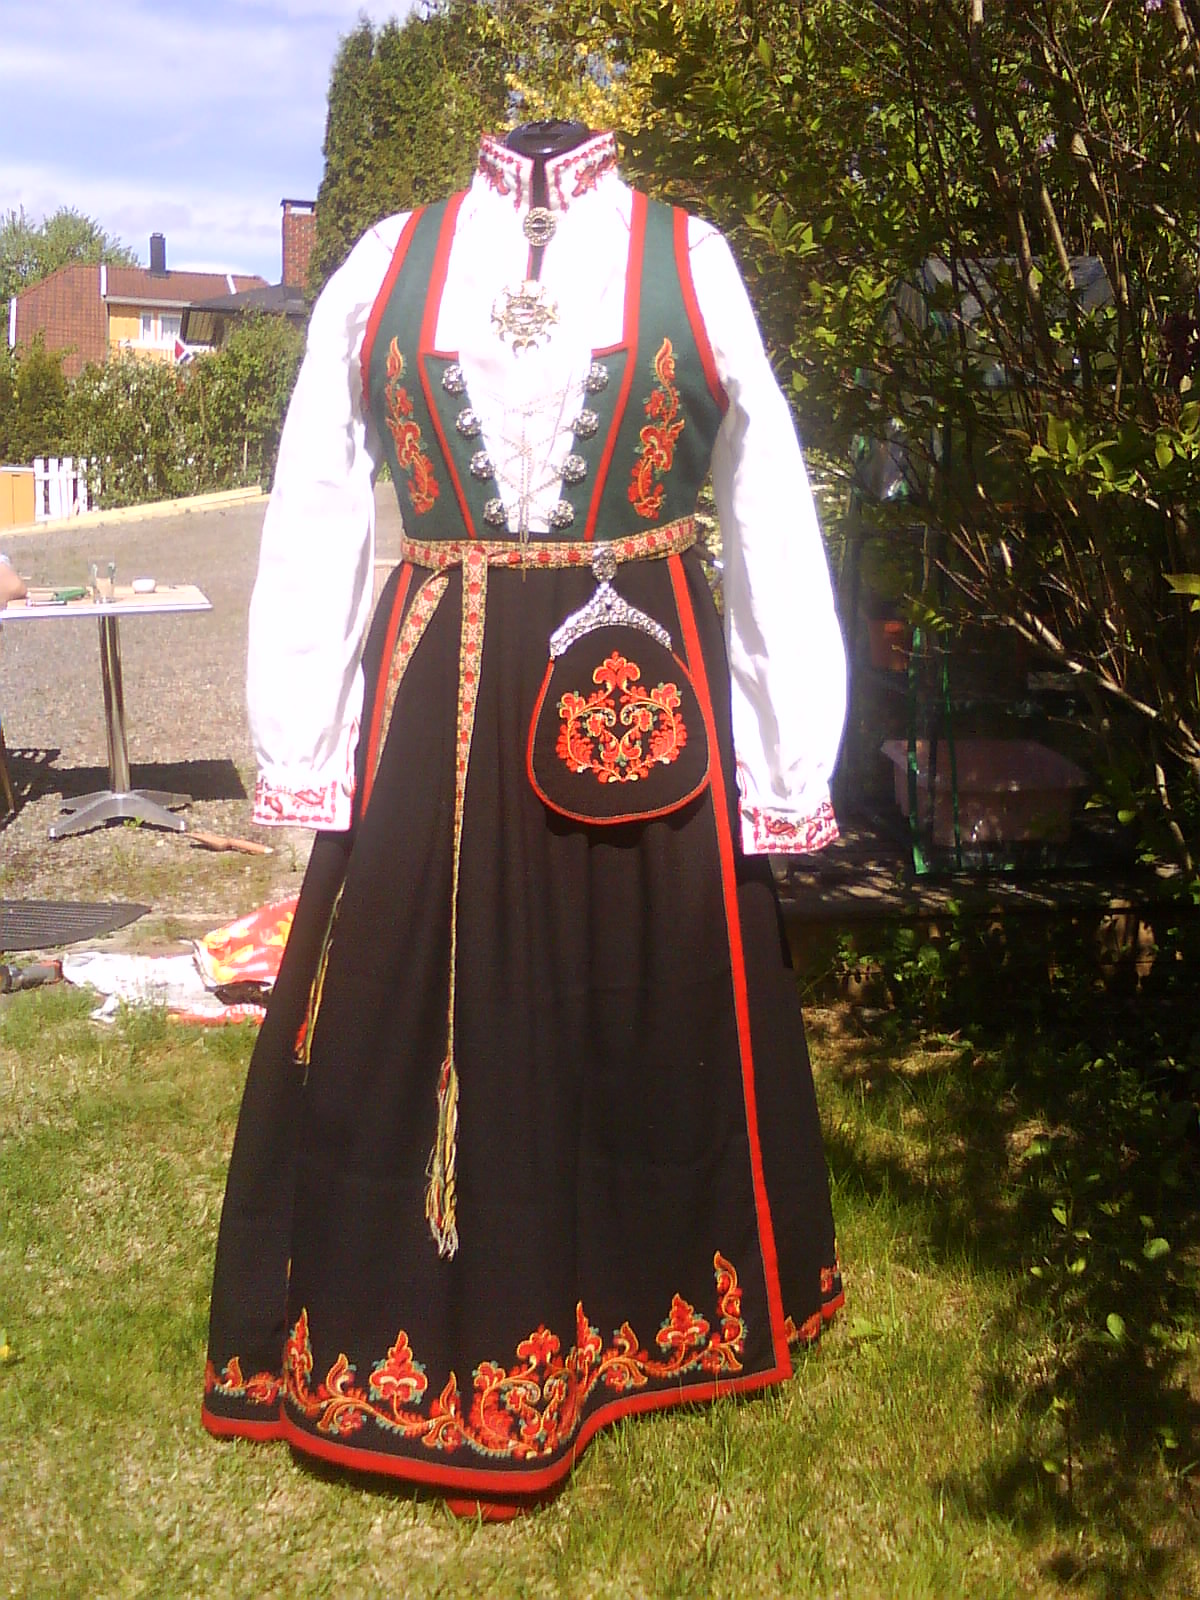
Hardanger bunad in a hurry


One of my ongoing project this year has been til make a Hardanger bunad for my daughter. However, since she started in the marching band this fall, she will not need her bunad for the 17. May parade, since she will be wearing a uniform. Thus, I was in no hurry to finish her bunad. However, we received an invitation to a confirmation in the beginning of May, and I decided to try to finish the bunad before then.

The only problem was that I had only five days to finish the bunad. I had finished all the embroidery on the chest cloth, the belt and the apron, which where all finished. I also decided to purchase a shirt, as my 11 year old daughter is still growing quite a bit. So the only thing remanding was to assemble the bunad itself. I was a bit unsure whether I would be able to make it, but I decided to give it a try. I have to admit that I was working from I came home from work and until late in the evening every day that week. When I was finished I was tired, but I made it!!!!

I had some serious challenges making this bunad, particularly since my daughter is only eleven and I bought the materials for a grown up bunad. I did this to avoid making a children's bunad which she could only use a couple of years. The challenge lay in assembling the bunad in such a way as to make alterations to the size simple. This meant that I had to deviate from the guidelines somewhat, but it was easier than I feared. The main problem now is that there is a lot of fabric in the skirt for such a small girl (it is made of heavy wool), and she does not fill inn the area behind the chest cloth very well. I guess this will be better as she grows older.

As I was going to buy the shirt, I expected this to go without a hitch. Unfortunately, this was not so, as both the neck line and the manshetts around the wrists were too tight, even if I bought a small sized grown-up shirt. So I had to increase the size, resulting in the arms being far too long. So I had to adjust them as well.

Finally, I have to tell you about the apron. It is a copy of an apron made by the sister to my father-in-law's mother. She was from Eiterheimsneset in Hardanger. I do not know how old this apron is, but moster Mari (as she was called) died of old age in the mid eighties, so it is probably quite old. The apron is made in cotton, as the original, and has a very light and beautiful Hardanger embroidery in the border. My mother-in-law is waring the original apron on her bunad, so now grandmother and granddaughter have matching bunads with identical aprons.

It was a very exhausting week, but I am very pleased with it. The house looked terrible, and my husband was not thrilled by having to do all the chores in the hose for an entire week, but it does not matter. I still have a deep feeling of accomplishing something good. Now, I only have to make a linen apron and a linen shirt with elaborate Hardanger embroideries, and to make a new chest cloth and belt with pearl embroideries, before I consider this bunad project for officially finished. Luckily for me, the rest of the work can wait a couple of years until my own daughter's confirmation.


.

Wednesday, 28 March 2012

Needle bound driving mittens

Here comes the last pair, and the jewel in the crown, of my series of mittens based on Heidi Fossnes' book "Håndplagg til bunad og folkedrakter". The original pair of mittens was found in Sauherad in Telemark. The original pair came to the museum in 1892, but they do not know exactly how old they are. They do, however, have a similar pair at the museum, which they know is from 1811, because it is embroidered on the back of the mittens. Thus, it is reasonable to believe that this pair is from the first half of the nineteenth century.

These mittens are made by an ancient technique called "nålbinding" (Norwegian) or needle binding (English). They have found garments made by this technique all the way back to the viking area, and even earlier. Needle binding is great fun and quite easy to do, when you get the hang of it. Basically, you are winding the yarn around your thumb, while you are anchoring it in the loop under and besides. This is an excellent technique to use on mittens, as it does not run. This makes the mittens easy to repair. On the other hand, it makes it extremely difficult to correct an error, as it is virtually impossible to unravel the work. The last point was a problem for me, as I had never tried needle binding before. On one occasion, I had to cut of an entire thumb to fix a problem.

Heidi Fossnes does not describe how to needle bind in her book, so I had to look it up on the Internet. It turned out not to be a problem, as there are several good instruction videos out there. You only have to search for "naalbinding" or "needle binding", and several alternatives pops up. I preferred this video. It is in German, but if you know some German (as I do) it is a very good instruction. For this project I used "der Oslo stitch", since it looked like this was the stitch applied in the original pair of mittens.

The mittens are made in PT 3, which is a thick wool yarn which is easy to felt. The mittens are relatively large when they are made (43 cm), but they shrink dramatically during the felting and is just over 30 cm when finished. The embroideries are made in a combination of cotton thread by DCM and a fine wool thread by Appelton, which I doubled in order for it to fill out the embroidery properly.

I could not use a fabric pen to draw the pattern on the mittens prior to the embroidery, since the felting made the drawings unclear. Thus, I needed to sew these mitten by free hand. Thus, I waited a while, to get some practise on the other mittens I made in this series of mittens (which was probably wise), before finishing the embroideries on these mittens.
In the book, there were almost no instructions on how to make the actual mittens, only a down scaled drawing of the outline of the mitten. Thus, I did not know how many stitches to cast on or how to increase or decrease to give the mittens its shape. This was a bit problematic, since needle binding is like knitting and crocheting: it tightens up after a couple of rounds. Thus, it took me several attempts to get it right (in particular considering the difficulties I had undoing what was already made). I have written down the pattern for the mittens I made, in order to make it easier the second time around.  You can download the pattern free of charge here. Unfortunately, the pattern is in Norwegian, but with the help of Google translator, I hope it will be possible to understand for non-Norwegians as well. Together with the book and an instruction video of how to do the needle binding, it should be possible to make these mittens. The embroideries are pretty hard to do, but the needle binding is easy when you get the hang of it. And the result is tremendously rewarding. Good luck!

Monday, 5 March 2012

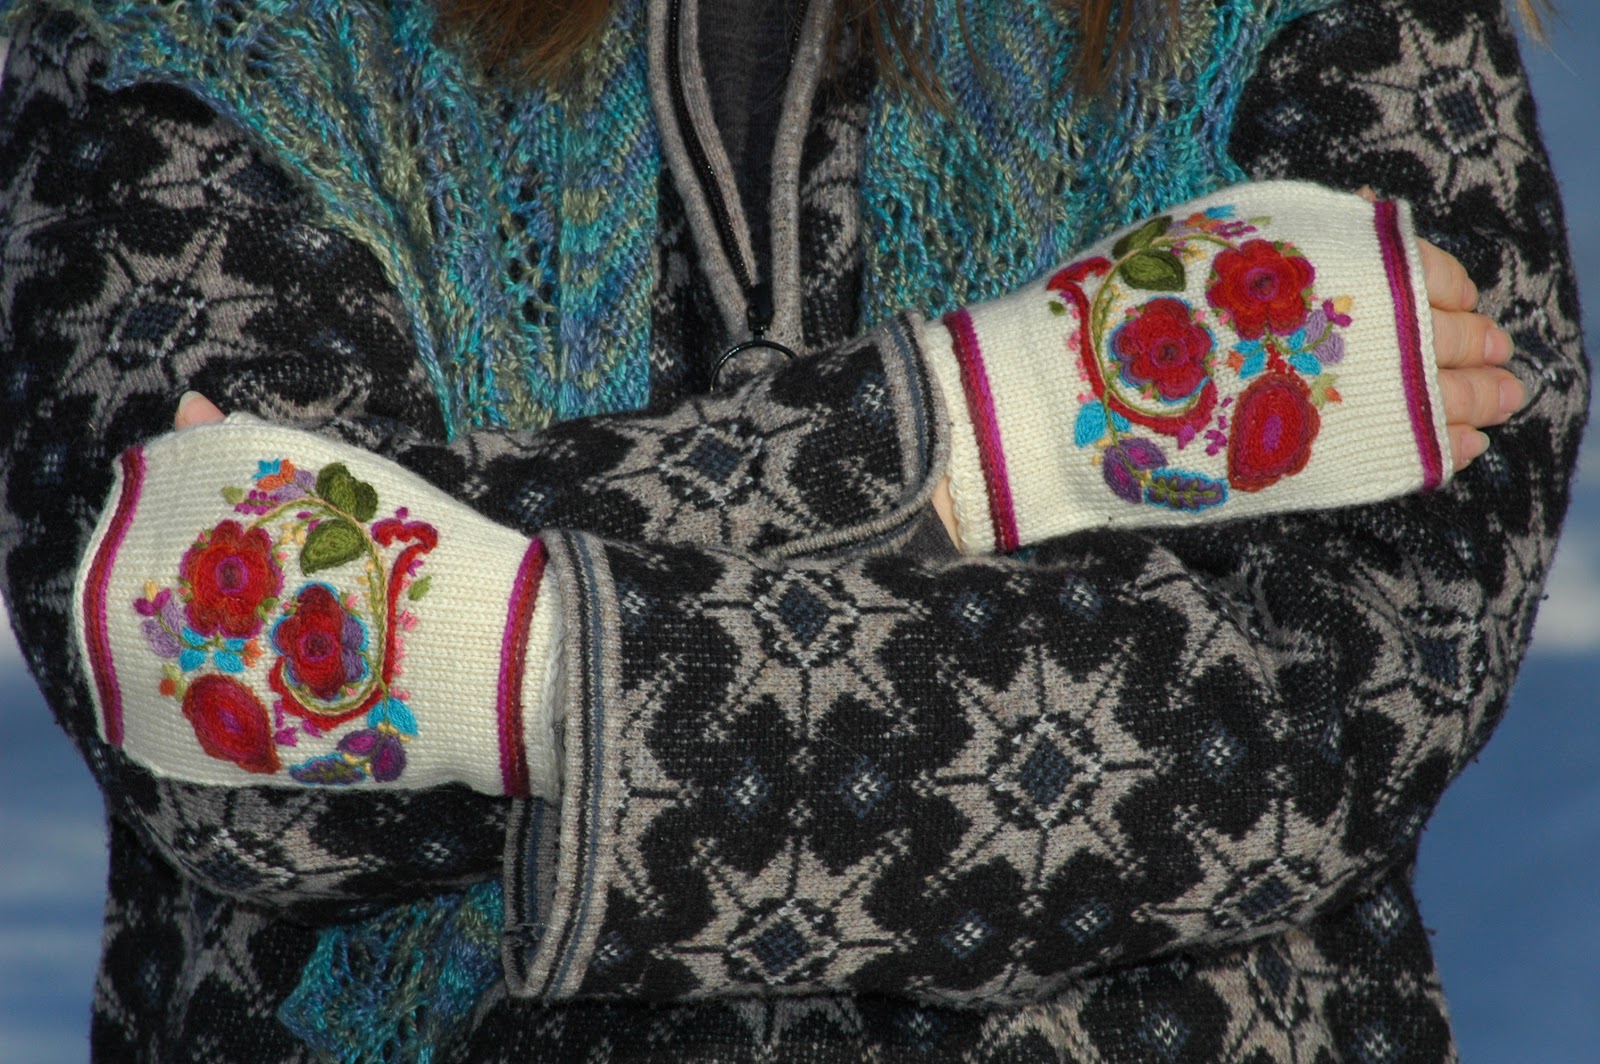
Fingerless mittens with rose seam II


Here comes my favourite pair in this series of mittens based on Heidi Fossnes' book "Håndplagg til bunad og folkedrakter". Originally, this embroidery was sewn onto a pair of grey mottled gloves found on Vaalund farm in Tinn in Telemark. They do not know how old the gloves are, but they believe they are from the turn of the last century.

As I was making fingerless mittens for my film project, I used a pair of white mittens based on a pattern from Ål in Hallingdal as a background for this embroidery. My mittens are knitted using a thin yarn called Dale Baby Ull on needles number 1,5 mm. The embroideries are made in a fine wool thread from Appleton. In comparison with the other pair of fingerless mittens with rose seam, this thread worked very well on these mittens, because the area to fill in the embroideries was much smaller.

In the beginning, I did not notice this pattern in the book, because the embroidery kind of despaired in the mottled background. But when I saw the drawings, I figured that maybe they weren't so dumb after all. I had already finished the number of mittens that I had promised to make, but I had a skein of baby wool lying around, so I thought it might be worth while to give it a try. And I have not regretted this decision for a moment.
This is definitely my favourite pair. In particular, I love the straws curving slightly up towards the index finger. I am also pleased with the colour balance in the embroidery, and the little circle on the thumb, which I attached to give it some colour on the back of the mitten. And I also love the pictures my husband made for me.

Thursday, 1 March 2012

Fingerless mittens from Valle in Setesdal


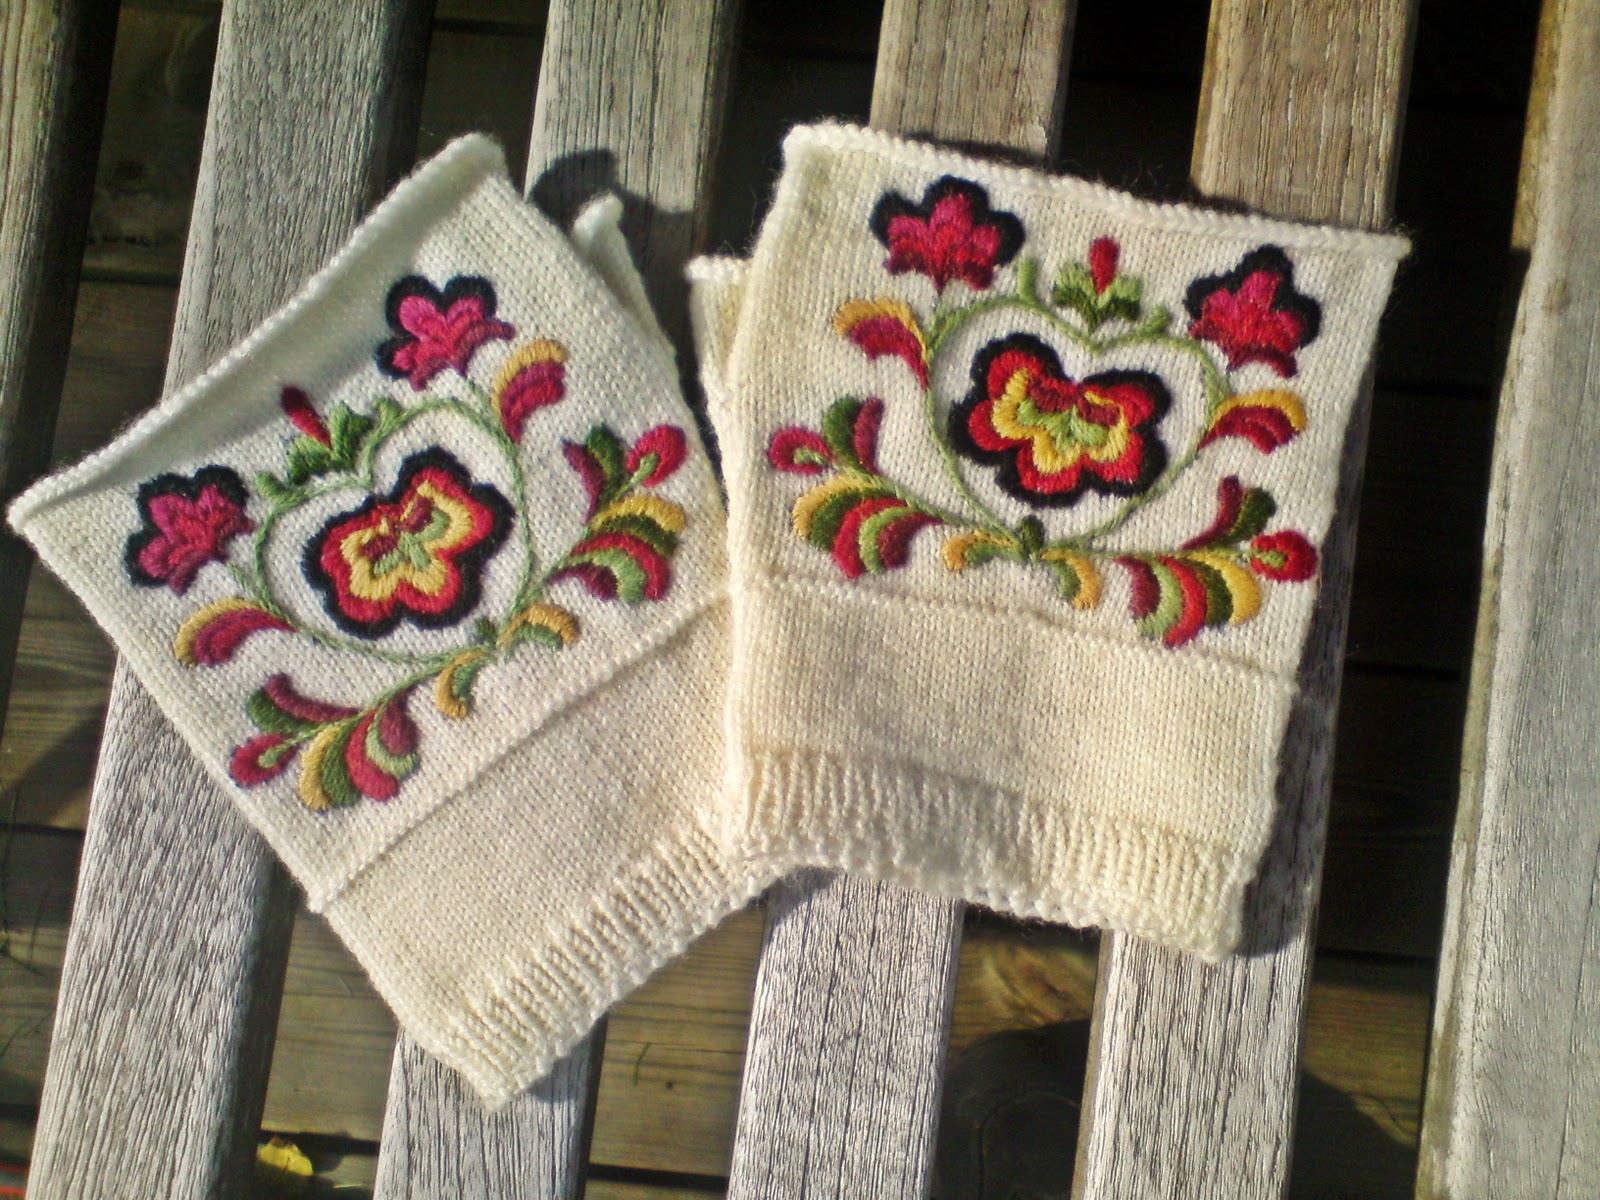
Here comes yet another pair of fingerless mittens in my series of mittens based on Heidi Fossnes' book "Håndplagg til bunad og folkedrakter". The original pair was found on Løyland farm in Valle in Setesdal. They do not know how old these mittens are. You can find a picture of a reproduction of the original pair of mittens here.


These fingerless mittens are knitted in a yarn called Falk from Dale on 2 mm needles. The embroidery is done with a fine wool thread from Appelton. I doubled the thread to give the pattern more fullness.

I knitted two pair of mittens; one white pair and one black pair (like the original). The white pair was the first one I made, and the black pair was the last mittens I made in this series of mittens.

These were by no comparison the most difficult pair to make, despite that they looked strait forward. However, the angle of the stitches and the coarse knitted fabric made it virtually impossible to get the edges of the hart pretty and even.
Furthermore, on the black pair, I was not able to transfer the motif by tulle and fabric pen, as I was able to on the white pair. Thus, I needed to sew the pattern on the black pair by freehand.

These are not the pair that you start on the first time you try to make such mittens. They are far to difficult to make. But if you have some practice, and you get the angles right, they become really beautifull.


Tuesday, 28 February 2012

Fingerless mittens from Heidal

Here comes another pair of fingerless mittens in my series of mittens based on Heidi Fossnes' book "Håndplagg til bunad og folkedrakter". Originally, this embroidery was sewn on a pair of black mittens that was found in Heidal, in Nord-Gubrandsdalen. The original pair came to museum in 1911, so they are probably from the last half of the 1900th century. You can find a picture of a reproduction of the original pair of mittens here.

These fingerless mittens are knitted in a yarn called Falk from Dale. The pattern for the fingerless mittens is originally from another pattern in the book, and comes from Valle in Setesdal. The embroidery is done with a fine wool thread from Appelton. I doubled the thread to give the pattern more fullness.
This was a fairly easy and fast pair of mittens to make, and the embroidery was easy to get pretty even if the mittens are knitted in a relatively thick yarn with (in this context) relatively large needles (2 mm). The pattern was a bit too big for the fingerless mittens, but I made them go into the upper edge, which made them look pretty anyway. I highly recommend this pattern, even if it probably looks best on a black pair of mittens as in the original.

Monday, 20 February 2012

Fingerless mittens from Ål in Hallingdal

Here comes the next pair in my series of mittens based on Heidi Fossnes' book "Håndplagg til bunad og folkedrakter". The original pair came Ål i Hallingdal, and came to the museum in1892. They do, however, not know how old the mittens are.

My mittens are knitted in Dale Baby Ull on needles 1,5 mm.  The mittens are embroidered with a fine wool thread from Appelton.

These mittens are relatively easy to make compared to many of the other mittens, as the thin yarn and needles makes it easier to get the embroidery even. This is a good pair to start on, together with the other pair of fingerless mittens from Ål in Hallingdal that I have made, if you like to try to make these kinds of embroidered mittens for the first time.

Sunday, 12 February 2012

Fingerless mittens with rose seam


My latest project has been a series of fingerless mittens and driving mittens based on patterns from Heidi Fossnes' book "Håndplagg til bunad og folkedrakter". Here is the first pair. It is a couple of fingerless mittens with an embroidery of rose seam found on a pair of gloves from Tinn in Telemark. The original pair of gloves was found on Vaalund Gård, and is probably from around the turn of the century.


The mittens are knitted in a wool yarn called Falk from Dale. The pattern for the mittens is also from Heidi Fossnes' book, and originates from Valle in Setesdal. The rose seam is embroidered in a fine woll yarn from Appelton. There is an incredible amount of beutiful shades of colours, which made the task of finding the yarn for the embroidery easy.

The rose seam is sewn with contour stitches, also as fillings. This makes the embroidery almost three dimensional. You should probably use a thicker more hard spun thread for this kind of embroidery, but I did not find this kind of thread with sufficiently large array of colours in my local craft store.

Wednesday, 28 September 2011

Fingerless mittens for bunads

When I visited my father this summer, I wanted to show him the bunad I had sewn this winter. To my surprise, he had a bunad encyclopedia, which he had bought on sale. He was very pleased, because he got an additional book for free, featuring old patterns for gloves, mittens, wristlets and fingerless gloves for bunads (see "Håndplagg til bunader og folkedrakter" by Heidi Fossnes).

It turned out that this was a treasure of a book, and I fall in love immediately. The author had travelled all over Norway, visiting museums, taking pictures of old mittens, gloves, wristlets and fingerless gloves (here after referred to as hand garment). Then she made a reconstruction of the old hand garments, making patterns. Most of the garments was from the mid to the end of the 19th century, but some were even older.
Many of these projects were incredibly beautiful, and photos of both the old garments and the new reproduction are presented in the book. I fell for many of then, among them these fingerless mittens from Ål in Hallingdal. There were no record of the age of these mittens, but you can find them in the museum in Drammen

.
Embroideries on knittings is actually harder to do than I expected, but after a while I got the hang of it. The big challenge was to transfer the embroidery pattern from the book to the mittens. The book suggests to do this by freehand, but I did not want to risk that. So I applied a technique from quilting, transferring quilt patterns. The trick is to make a copy of the pattern onto a piece of tulle fabric. Then you only need to go over the patterns with a pen, and the pattern will be transferred due to the holes in the fabric. My only problem was that all my fabric pens had dried out, so I used an ordinary felt pen instead. This resulted in some smearing, but despite this, it worked out well in the end.

This was my first attempt. I really liked it, so I will probably make more of the patterns in the book.

Monday, 19 September 2011

Chest cloth and belt for my daughter’s Hardanger bunad

Finally, I have finished the chest cloth and belt for my daughters Hardanger bunad (see first and last picture). The embroidery was made by cross stitches and not pearls, as they only sold finished chest cloths in pearl embroidery (not patterns). Since the whole idea was to make the bunad myself, this was not an option. However, I have made a pattern for a pearl chest cloth and belt based on some pictures I found on the internet. The plan is to make them as well, so that she can chose which one to wear today.

It was now time to start on the Hardanger embroideries on the apron. Since I have never tried this technique before, I asked my mother in law if I could borrow some of her books. When she came to visit, she did not only bring her books, but also a small chest cloth she had made with pearls (se picture on the left). It is a bit small, as she did not have more of the red fabric left, but if we are lucky, my daughter may use it the first couple of years before she is fully grown.

I have started the Hardanger embroideries on the apron. I started with a little purse to get some practice before starting on the expensive pieces (see picture on the right). Since Hardanger embroideries involve making holes in the fabric, it is crucial to know what you are doing. It was much easier than I expected, so I started on the linen apron right away, which was a challenge, since the stitches are much finer in linen compared to the cotton fabric in the purse. I will also make a cotton apron for my daughter, equal to the one my mother in law has. My husband’s grand aunt made the apron she wears, and it has a lovely pattern. Then they can wear them together.


My aim is to finish the aprons by Christmas, so that I can put the bunad together during the spring. If all goes well, my daughter will have her new bunad finished by next 17. May (which is the Norwegian national holiday, when all the lovely bunads are worn in the 17. May parade).

Monday, 8 August 2011

A Hardanger bunad for my daughter

My mother in law made a bunad from Hardanger for my daughter when she was five (see pictures below). It consisted of the west and hat from the bunad she had warned as a child, with a new skirt, shirt, apron, and belt and "chest cloth", which she embroidered with pearls. The bunad was beautiful, and my daughter loved it.


With some alterations, we were able to use the bunad until last year, but this year it was definitely too small. This meant that she could not wear her bunad for the 17. May celebrations (the Norwegian national holiday). This generated much frustration, especially since all but one of her class mates (female) wore their bunads.


Thus, it was time to make her a new bunad, which I actually looked forward to. The problems is that she is only 10 years old, and in-between the children’s and adult sizes. A bunad for children can only be used a couple of years, whereas the adult bunads would require several alterations to fit the first couple of years. Since a bunad is an expensive dress to make, I went for the adult version. We'll have to see if it is humanly possible to make the bunad fit next year. If not, we will have to wait before she receives her new bunad.

 
I have ordered and received the materials for my daughter’s bunad. She is smaller and more slender than me, so I used my size as an upper measure when I ordered the materials. I did not order the shirt, since it requires exact measures, since it is almost impossible to alter. She'll have to do with a plain bunad shirt until she is fully grown. Then I will make her a beautiful linen shirt with lots of Hardanger embroidery (see the first picture).

I also worried about the possibility to alter the belt and the chest cloth, since pearl embroideries are very stiff. However, Husfliden (which is the craft store where I bought my bunad fabric) only offered cross stitch embroideries for those who wanted to sew their own bunad. These are much softer and will hopefully not make a big bump under the west the first years.


I have almost finished sewing the chest cloth and belt. It has gone smoothly, since it is made of cross stitches.


The challenge comes with the Handanger pattern on the apron. I have never sewn Hardanger embroidery before, but I look forward to try. I have bought some small purses with Hardanger embroidery on (see picture) to put the silver for the bunad. The plan is to practice on these before starting on the more expensive fabrics of the bunad. It is also possible that I need to sew a smaller apron for her for the first years, since the motif on the adult apron is pretty large. In that case, she will receive the adult apron together with her shirt when she is fully grown. I also plan to sew a new chest cloth and belt with pearls (see the picture below for the pearl belt, and the first picture for the pearl chest cloth), that she will receive when she no longer grows.

As you can understand, I have a very complex and long-lasting bunad project for my daughter. I am optimistic, even though I have to be realistic concerning the possibility of being able to alter the bunad to fit her size the first couple of years. If I am not able to, she'll have to do with normal cloths for the 17. May parade in the mean time.

Monday, 20 June 2011

A new bunad for the 17th May


The 17th May is the Norwegian national holyday, when everybody dress up and walk in the parade. Bunads are traditional folk costume. They are copies of old dresses (from the 18th and 19th century), and varies across the country. I made my own bunad from Telemark, where my fathers ancestors comes from. It took me almost 8 months, but I managed to finish before the 17th May.

I encountered several problems making this bunad. First, the shirt was too small, and I had to get it re-cut. Second, I had no instructions of how to put the jacket together. But with help from the instructor at my bunad course, these problems were overcome.


I have to admit the new shirt is still a bit tight over the shoulders, but I can manage. I do not want to make the shirt all over again. And, I have to admit that I was rather pleased with it. In particluar, I like the zigzag embroidery on the shoulders and along the neck-line. I also like the red wavy embrodery along the collar. I chose to make a "flee ladder" (directly translated from Norwegian) at the bottom the collar opening in the frot (see picture to the left), even if it was not specified in the instruction.

The jacket was much easier to put together than I had feared. It was actually quit strait forward, even without instructions. The only thing I was unsure of was how to attach the embroidered bindings on the sleeves, as they were apparanty too long. But the instructor at my course suggested that I also attached the binding down the split in the sleeve, which seemed to fit the embroidery perfectly (see picture to the right).

This bunad is probably the largest project I have ever taken on, but I loved every minute of it, and I would love to do it again. The next bunad is for my daughter. The fabric is ordered, and the plan is to finish before the next 17th of May.

 Here I am in my new bunad.